Building an e-commerce website was never quick and easy before! Excited to know how? Read down this 5-minutes blog.
3S Cart is basically an e-commerce enabler for e-commerce enthusiasts. It always comes in combination with an ERP software solution i.e. SMACC for simplifying the user experience concerning store management.
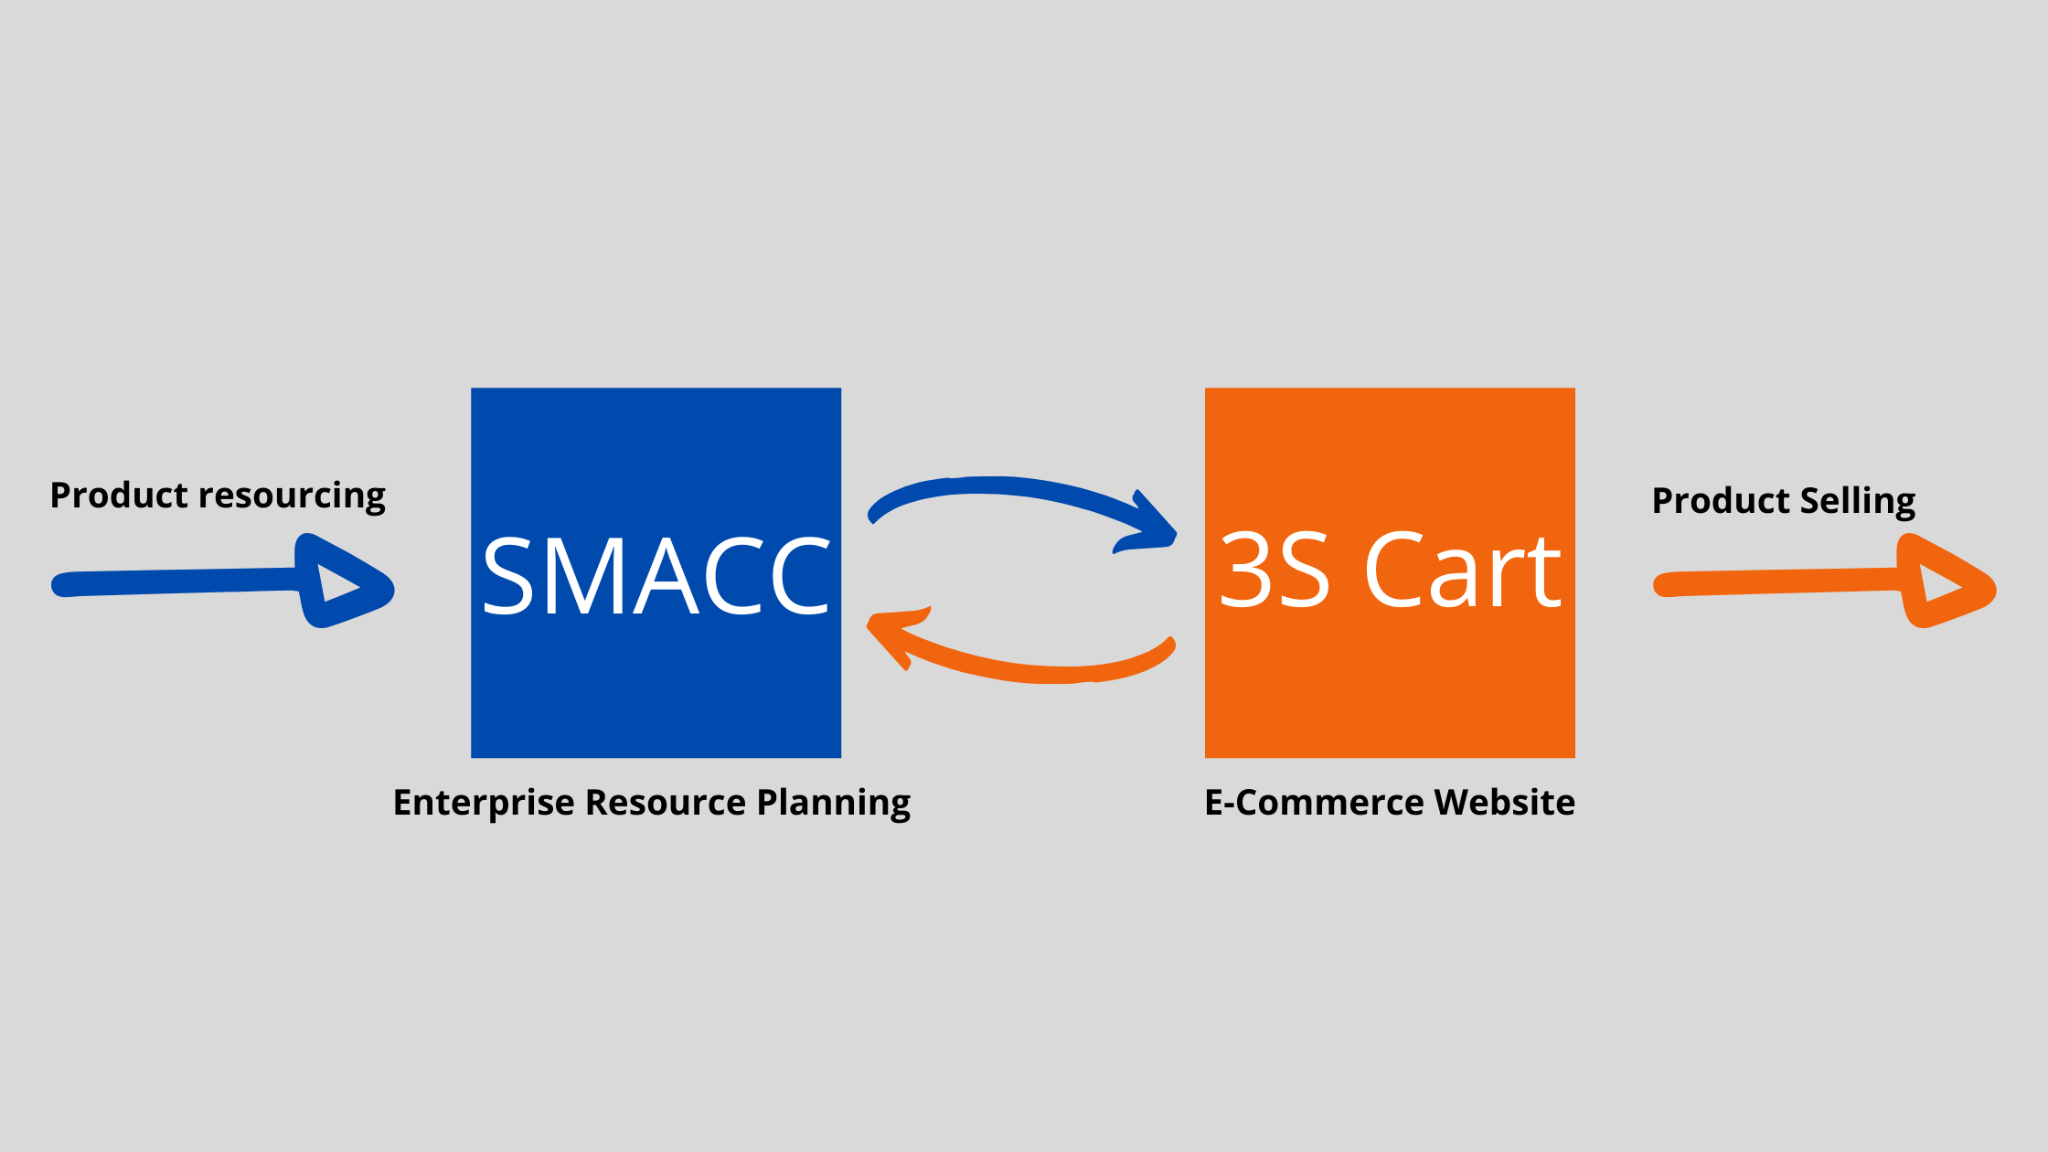
The above figure illustrates the interlinkage between SMACC and 3S Cart. Therefore, this modular approach is aimed to simplify and categorize the operations of product purchasing and product selling.
Therefore, before creating an e-commerce store, we make sure you have a point of managing enterprise resources first. Why is having this ERP software important and how does it benefit the store owners? Look at the reasons below. You will hardly need 3 minutes to create your e-shop with 3S Cart.
How an e-commerce website built with SMACC & 3S Cart simplifies business operations?
- 3S Cart provides simpler product management on the e-commerce storefront.
- Cloud-based ERP updates the inventory in real-time whenever a sale is made.
- Integrated POS Software of SMACC collaborates with product selling with 3S Cart, making it simpler to generate invoices.
- Detailed insightful reports.
- Efficient stock management with respect to the warehouse.
- SMACC has built-in full-featured financial accounting software, enabling the 3S Cart to ultimately cover the financial factors too.
You can achieve many more amazing benefits with your 3S Cart store. To create your e-commerce store, follow the following steps. They will take only 3 minutes to get your store ready!
Register Your Company Account on SMACC First!
First of all, go to the 3S Cart website, click on the Get Started button or visit this link to register your e-commerce store.
You can create your demo company for free by checking the checkbox available on the aforementioned registration link. During this trial period of 14-days, you can try all the e-commerce features powered by SMACC and 3S Cart.
Clicking on the Continue button, the system sends you an OTP on the phone number provided and redirects you to the following screen.
Verify the OTP here to register successfully.
Once the code is verified, log into SMACC via the URL and credentials received in OTP.
Being logged in, you’re all set to create your e-commerce store from page 3S Cart Portal > Setups > Store Settings.
Follow 5 Simple Steps To Set Up an E-Commerce Website on 3S Cart!
Once you’re logged in successfully via company credentials, navigate to 3S Cart Portal > Setups > Store Settings. The 3S Cart store-setup wizard has a series of five steps. Each step has different settings to configure. Don’t worry, this process won’t take much time. In a few clicks you’ll be all done!
Step 1: Store Settings
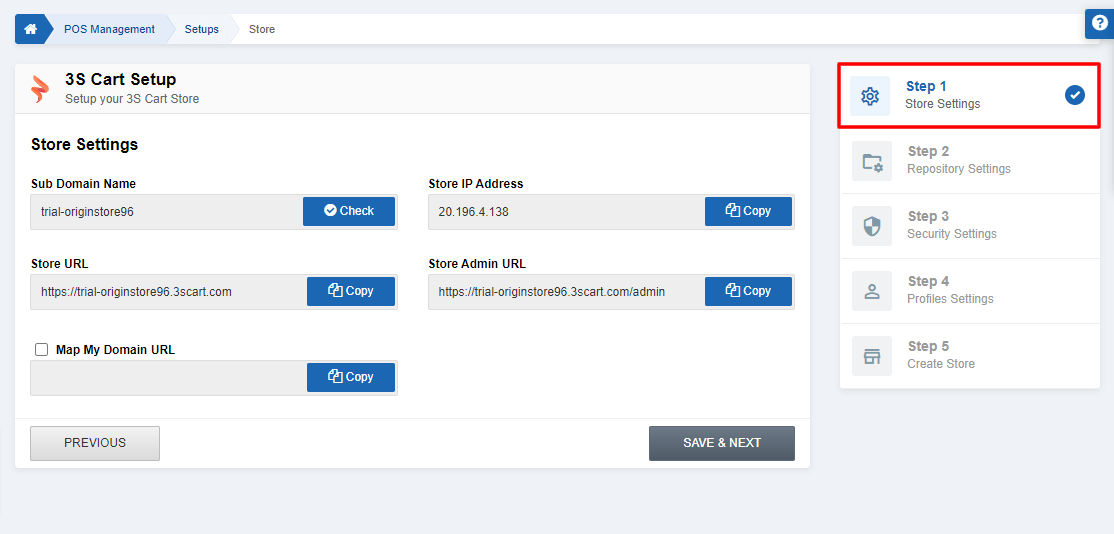
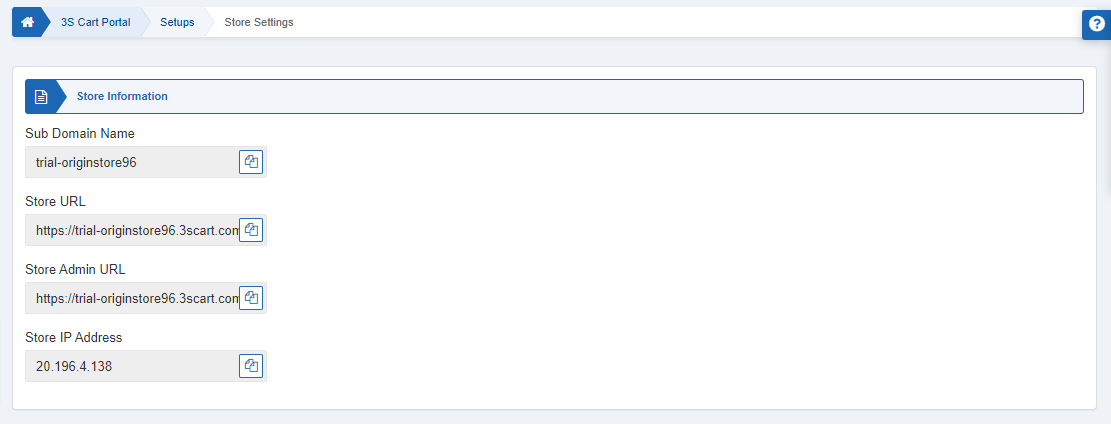
This wizard allows you to set up store’s information through which your customers can browse it. Simply enter the company name in the sub-domain name field and leave everything on SMACC. Your store’s IP address, URL, admin URL will be automatically created. Moreover, you can map your domain URL with your store.
Step 2: Repository Settings
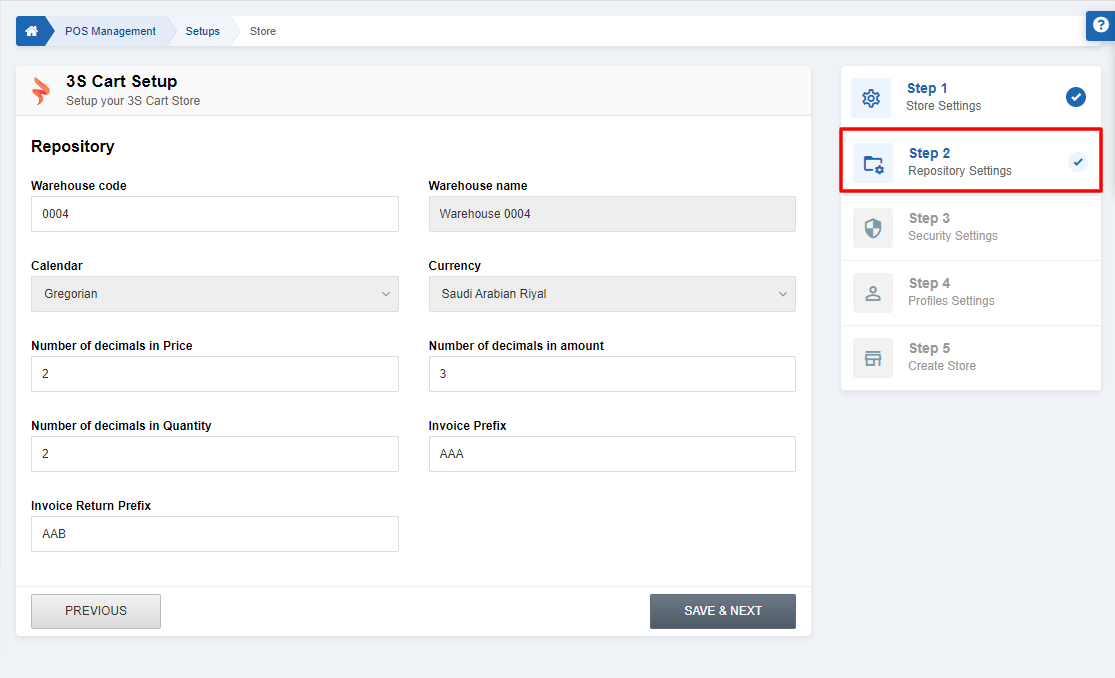
This second step of the series allows you to set up the store’s repository settings. Wherein, you have to select warehouse, calendar, currency and some information about price, amount, and invoice.
Note: The selection of a warehouse is possible if it’s already created in SMACC.
Learn here how to create a warehouse quickly in SMACC.
Step 3: Security Settings
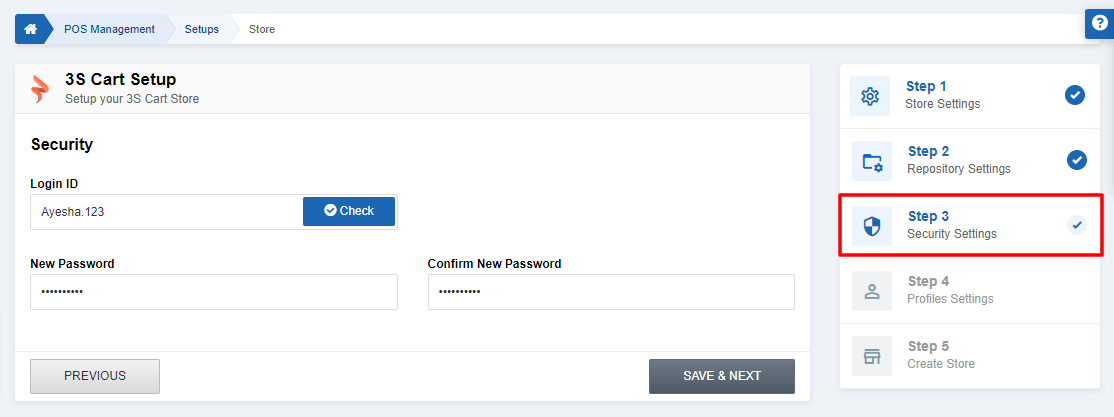
This third step provides you with the necessary fields to manage secure credentials of 3S Cart store. Only this authorized credential can help you login to the 3S Cart store. However, once you’re logged into the 3S Cart admin portal, you can create other authorized users of your website.
Step 4: Profile Settings
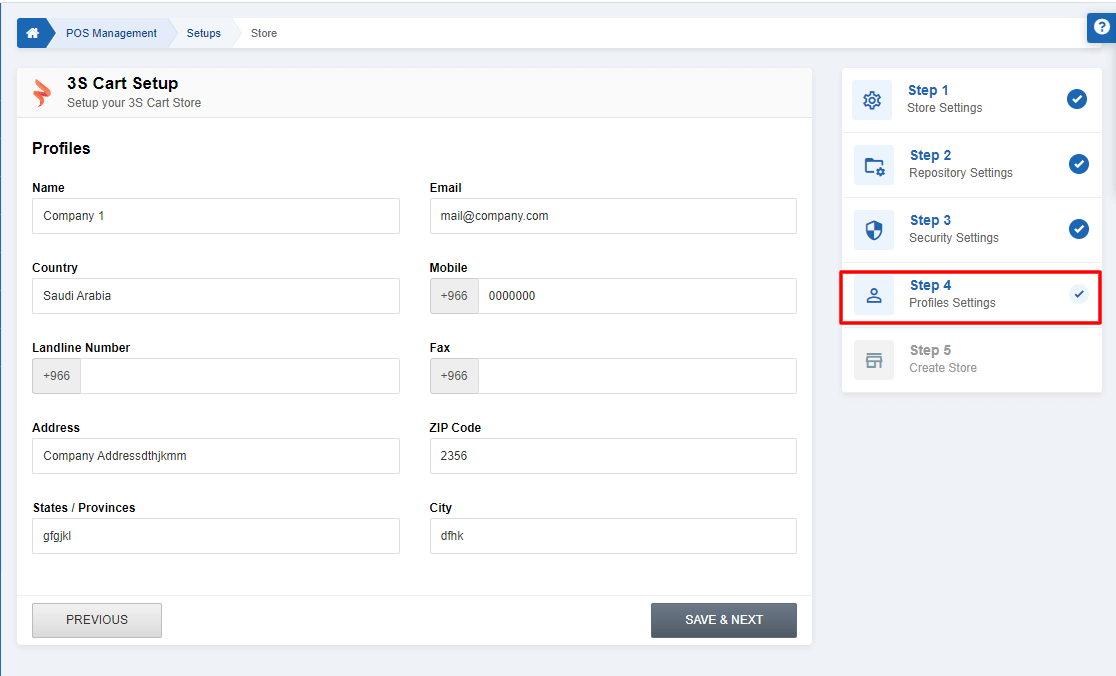
This is actually the last step where you have to input information. So, this step is for the store’s profile management. What fields do a store profile’s need? Nothing but obvious factors such as its name, location, email address, contact info. This is what you have to specify in this step.
Step 5: Create Store
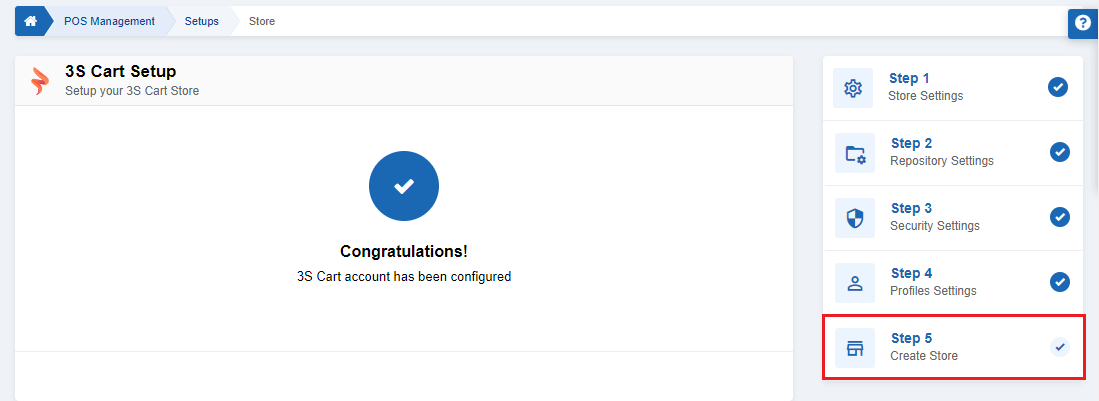
To reach this last step, simply click on the ‘Save and Next’ button on the previous step. Having clicked that, you’ll see that your 3S Cart account is created successfully.
Isn’t it quick and easy?
Now quickly on the same screen, SMACC will reload the page to display the following information of your e-commerce website built with 3S Cart.
Final Words
So this was the simplest and quickest way to create an e-commerce store with a powerful software solution SMACC.
Thus, you can buy SMACC according to your business that suits any of our price plans.
Nevertheless, in case of any help, feel free to contact us.